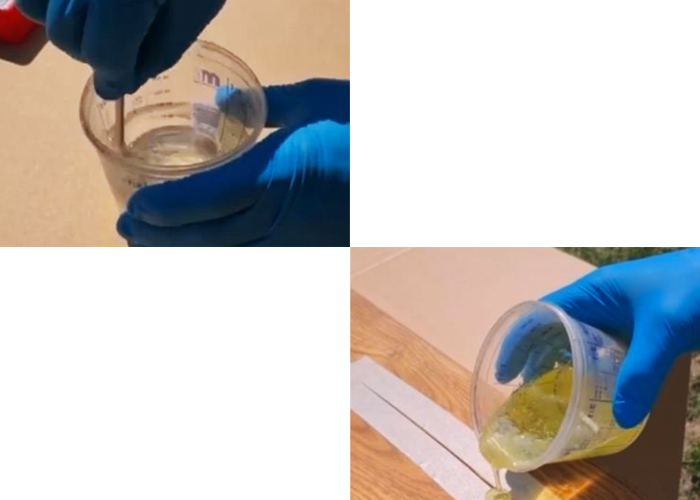
Epoxy repair

Solid wood is a living material that changes even after processing. Small cracks in solid wood are natural and do not constitute grounds for complaint. They do not affect the stability and durability of your table in any way. Solid oak is characterised above all by its robustness and ease of care. If you follow the most important care instructions, your piece of furniture will shine like the day it was delivered, even after several decades. However, a very warm, dry room climate can favour changes such as hairline cracks, warping and dry cracks on your solid wood elements and furniture. In particular, underfloor heating, fireplaces and direct sunlight are factors that have an unfavourable effect on the natural material wood.

If cracks have appeared in your solid wood furniture, there is no need to worry. With the help of our epoxy repair kit, you can seal them yourself and thus restore the overall intact appearance of your solid wood product. Our repair kit is ideally suited for the permanent bonding of wood and has a high adhesive strength, is tough and hard and can be sanded.

Instruction

1. Taping

First, tape the enclosed adhesive tape exactly at the crack gap on the left and right as well as the lower and front side of the panel. We recommend taping as precisely as possible at the crack gap so that the resin mixture does not get onto the surface during casting and thus possible reworking is saved.

2. Occupational safety

Now put on the enclosed gloves and wear them during the entire time of the repair or when handling the repair kit.

3. Dose & mix

Important note: The processing time is approx. 5 minutes and is shortened with larger mixtures and increased ambient temperature!

.

Pour the resin and hardener in a ratio of 1:1 into the enclosed mixing cup or a suitable base such as thick paper, cardboard or foil and mix quickly and thoroughly for approx. 1 minute with the wooden stirring spatula.

Caution!
The resin/hardener mixture will get warm!
Be careful when handling the mixing cup.

4. Processing

After mixing the components, fill the resin mixture into the gap until it is sealed. Pay particular attention to a flush finish of the surface for a planar appearance. The bonding reaches its initial strength after approx. 10 minutes.


5. Finalise

Wait until the resin mixture has hardened and after a few minutes pull the tape off your panel. Anything that peeks out over the gap can be peeled off with a spatula or knife.

6. Sanding & oiling (optional recommendation)*

Sand the surface until you obtain a flat surface and proceed as follows. If there is further damage to the resin mixture in your board/surface, this should also first be sanded out over a large area with coarse 80 grit sandpaper.
After sanding with “80 grit”, sand gradually with 150, 220 grit in the direction of the grain so that the sanding marks are no longer visible later.
A “hand sander” saves a lot of energy and effort here.
Very deep and large scratches are best filled with a hard or soft wax. Once all existing damage has been sanded and filled, the top and edges should be sanded with 320 grit hand sandpaper in the grain direction of the wood.
Important note: After the surface has been sanded, it must be thoroughly cleaned and dusted before oiling.

* SPON-HOLZ wood care kit required

The re-oiling is now done in 5 steps:

Step 1:

Apply wood oil to a lint-free cotton cloth and then rub in the direction of the grain of the wood until the surface shows even wetting. In places where more wood oil is absorbed, you can re-oil as desired until the solid wood surface shows even saturation.

Step 2:

First let the oil work on the surface for 20 to 30 minutes.

Epoxy repair video

Step 3:

After soaking, remove the excess oil in the direction of the grain with a cotton cloth and buff so that the surface is dry to the touch. Excess oil is not absorbed by the surface and tends to create a bacon-like, sticky surface. After about another 30 minutes, check the surface for residues and re-polish if necessary.

Step 4:

Allow the surface to dry overnight.

Step 5:

Optimally, the surface has already reached an even saturation and further oiling is not necessary. However, if the wood fibres have stood up in some places, resulting in a rough surface, you should sand the surface again with 320 grit hand sandpaper and repeat the oiling process.
Important note: Please note that a small “cloud” will appear on the surface if the table top is only locally sanded and oiled.

Caution!
Cloths saturated with wood oil can ignite themselves!
Always allow oil cloths to dry spread out!